Analog Photography

Easter with Expired Film | Kodak Gold 200

CORRECTION

Shooting 200 speed film at 50 would be 2 stops overexposed. Setting the camera at 75 would be 1 1/2 stops overexposed. However, I did not shoot at 50. The clip shown was recorded purely for demonstration and I moved the ASA dial back to 200 after recording. I actually overexposed by using the F3’s exposure compensation dial which I did set to the equivalent of 1 1/2 stops over so the results seen in this video do align with what I was saying.


If you're considering buying any of the products mentioned, please support my work by using the links below.

Fujifilm Fujicolor C200 https://amzn.to/3NXL3f4

Nikon F3 https://amzn.to/3KxGlm3


Want to support my work?

Consider visiting the shop and buying "Absolutely Nothing"
https://www.HaiHoangTran.com/shop/absolutely-nothing

or

Become a YouTube member!

https://www.youtube.com/channel/UCLUO-2ltlWfydRZ7pRRnXkw/join

Become a Patron!
https://www.patreon.com/HaiHoangTran

or

Buy some official merch!
https://www.youtube.com/haitran/store

PayPal
https://www.PayPal.me/HaiHoangTran

or

Just shop on Amazon via this link!
https://amzn.to/2FgsDnG

Nikon F3 + Fujifilm C200


If you're considering buying any of the products mentioned, please support my work by using the links below.

Fujifilm Fujicolor C200 https://amzn.to/3NXL3f4

Nikon F3 https://amzn.to/3KxGlm3


Want to support my work?

Consider visiting the shop and buying "Absolutely Nothing"
https://www.HaiHoangTran.com/shop/absolutely-nothing

or

Become a YouTube member!

https://www.youtube.com/channel/UCLUO-2ltlWfydRZ7pRRnXkw/join

Become a Patron!
https://www.patreon.com/HaiHoangTran

or

Buy some official merch!
https://www.youtube.com/haitran/store

PayPal
https://www.PayPal.me/HaiHoangTran

or

Just shop on Amazon via this link!
https://amzn.to/2FgsDnG
Around Washington w/ Kodak GC Ultramax 400

What’s going on guys, it’s Hai and I recently took the Nikon N2020 back out because I wanted to shoot some film. For this, I decided to pair it with a roll of Kodak Ultramax 400.

This film stock is intended to be more budget-friendly and I guess you can say more low-end. I view this film as something intended for people to pop into a camera and more so just catalog daily life, for people to take photos of their kids and just ordinary things like that. It’s not a specialized film and not saying that it can’t, but I don’t think it was really meant for professional applications.

Now, a little disclaimer. For this roll of film, I decided to have it developed and scanned by a local business. I don’t know the chemicals that were used to develop the film, I don’t know the scanner used to scan the film, or the type of post-processing done. This was my first time not doing all these things for myself so it’s definitely different from what I’ve previously showcased on this channel. Having someone else do everything just makes my life easier and will hopefully mean that I’ll be able to do more analog photography videos.

Ok, with that out of the way, let’s journey through this roll of Kodak Ultramax 400.

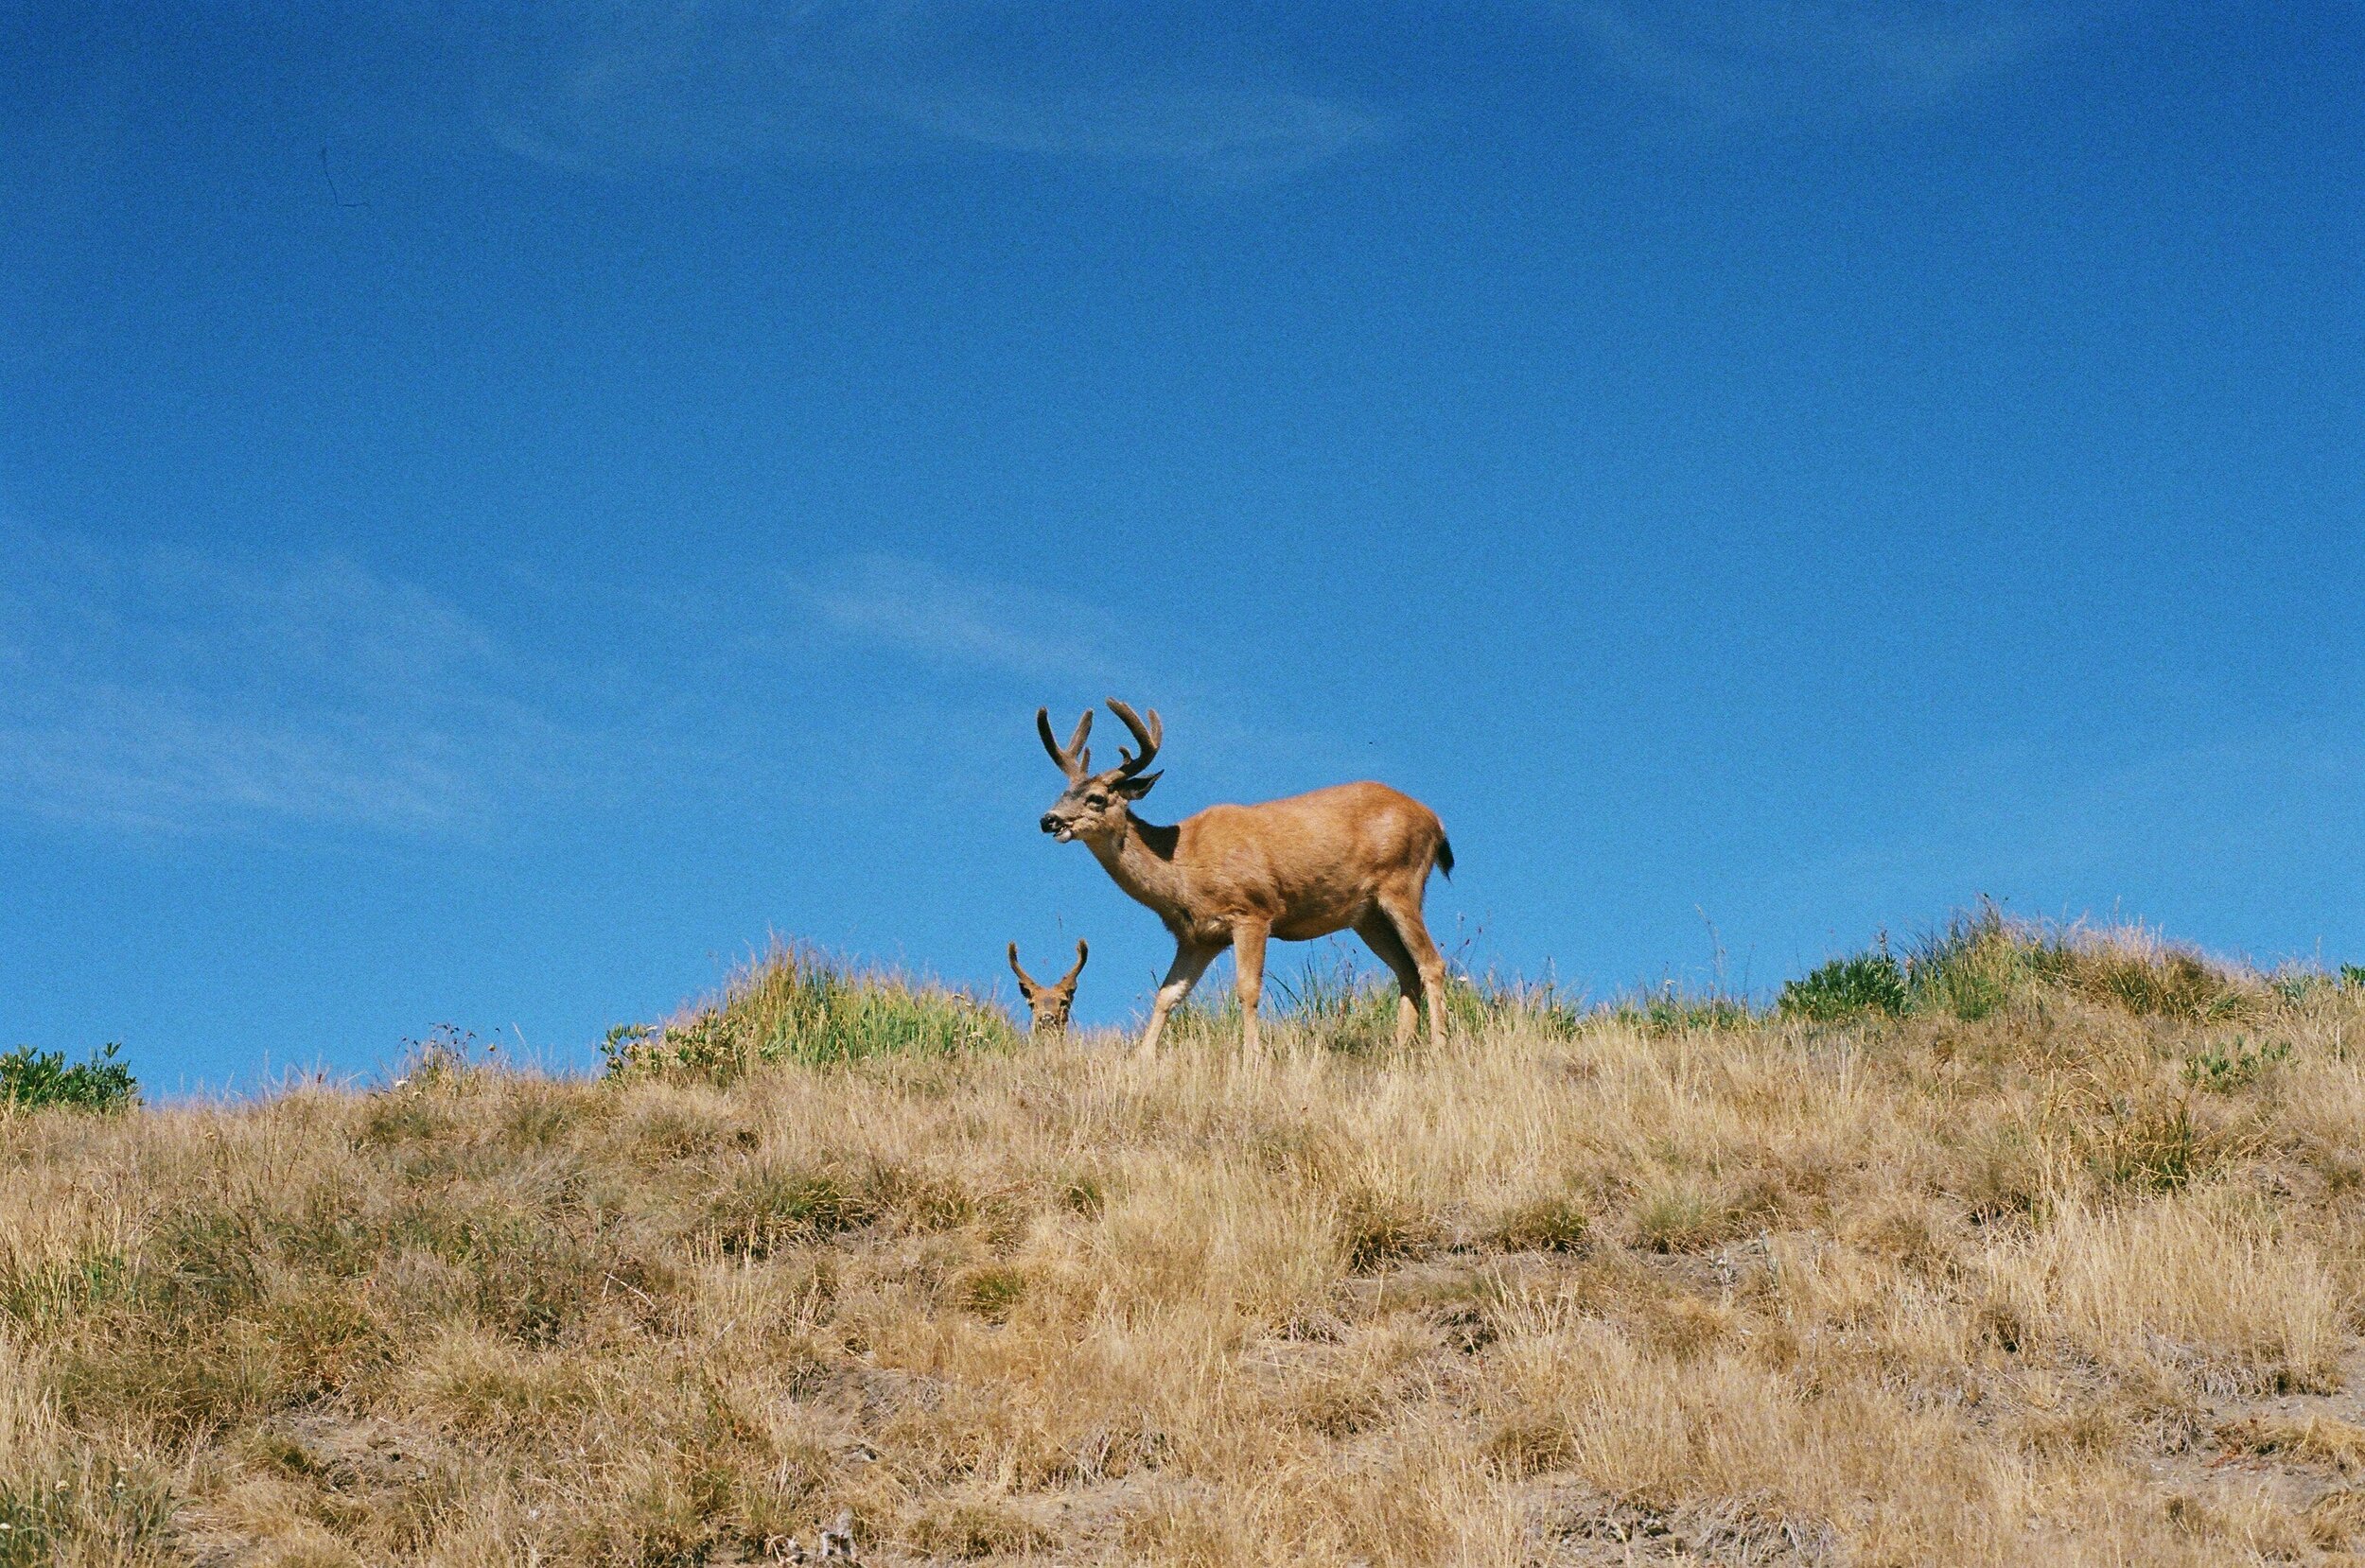
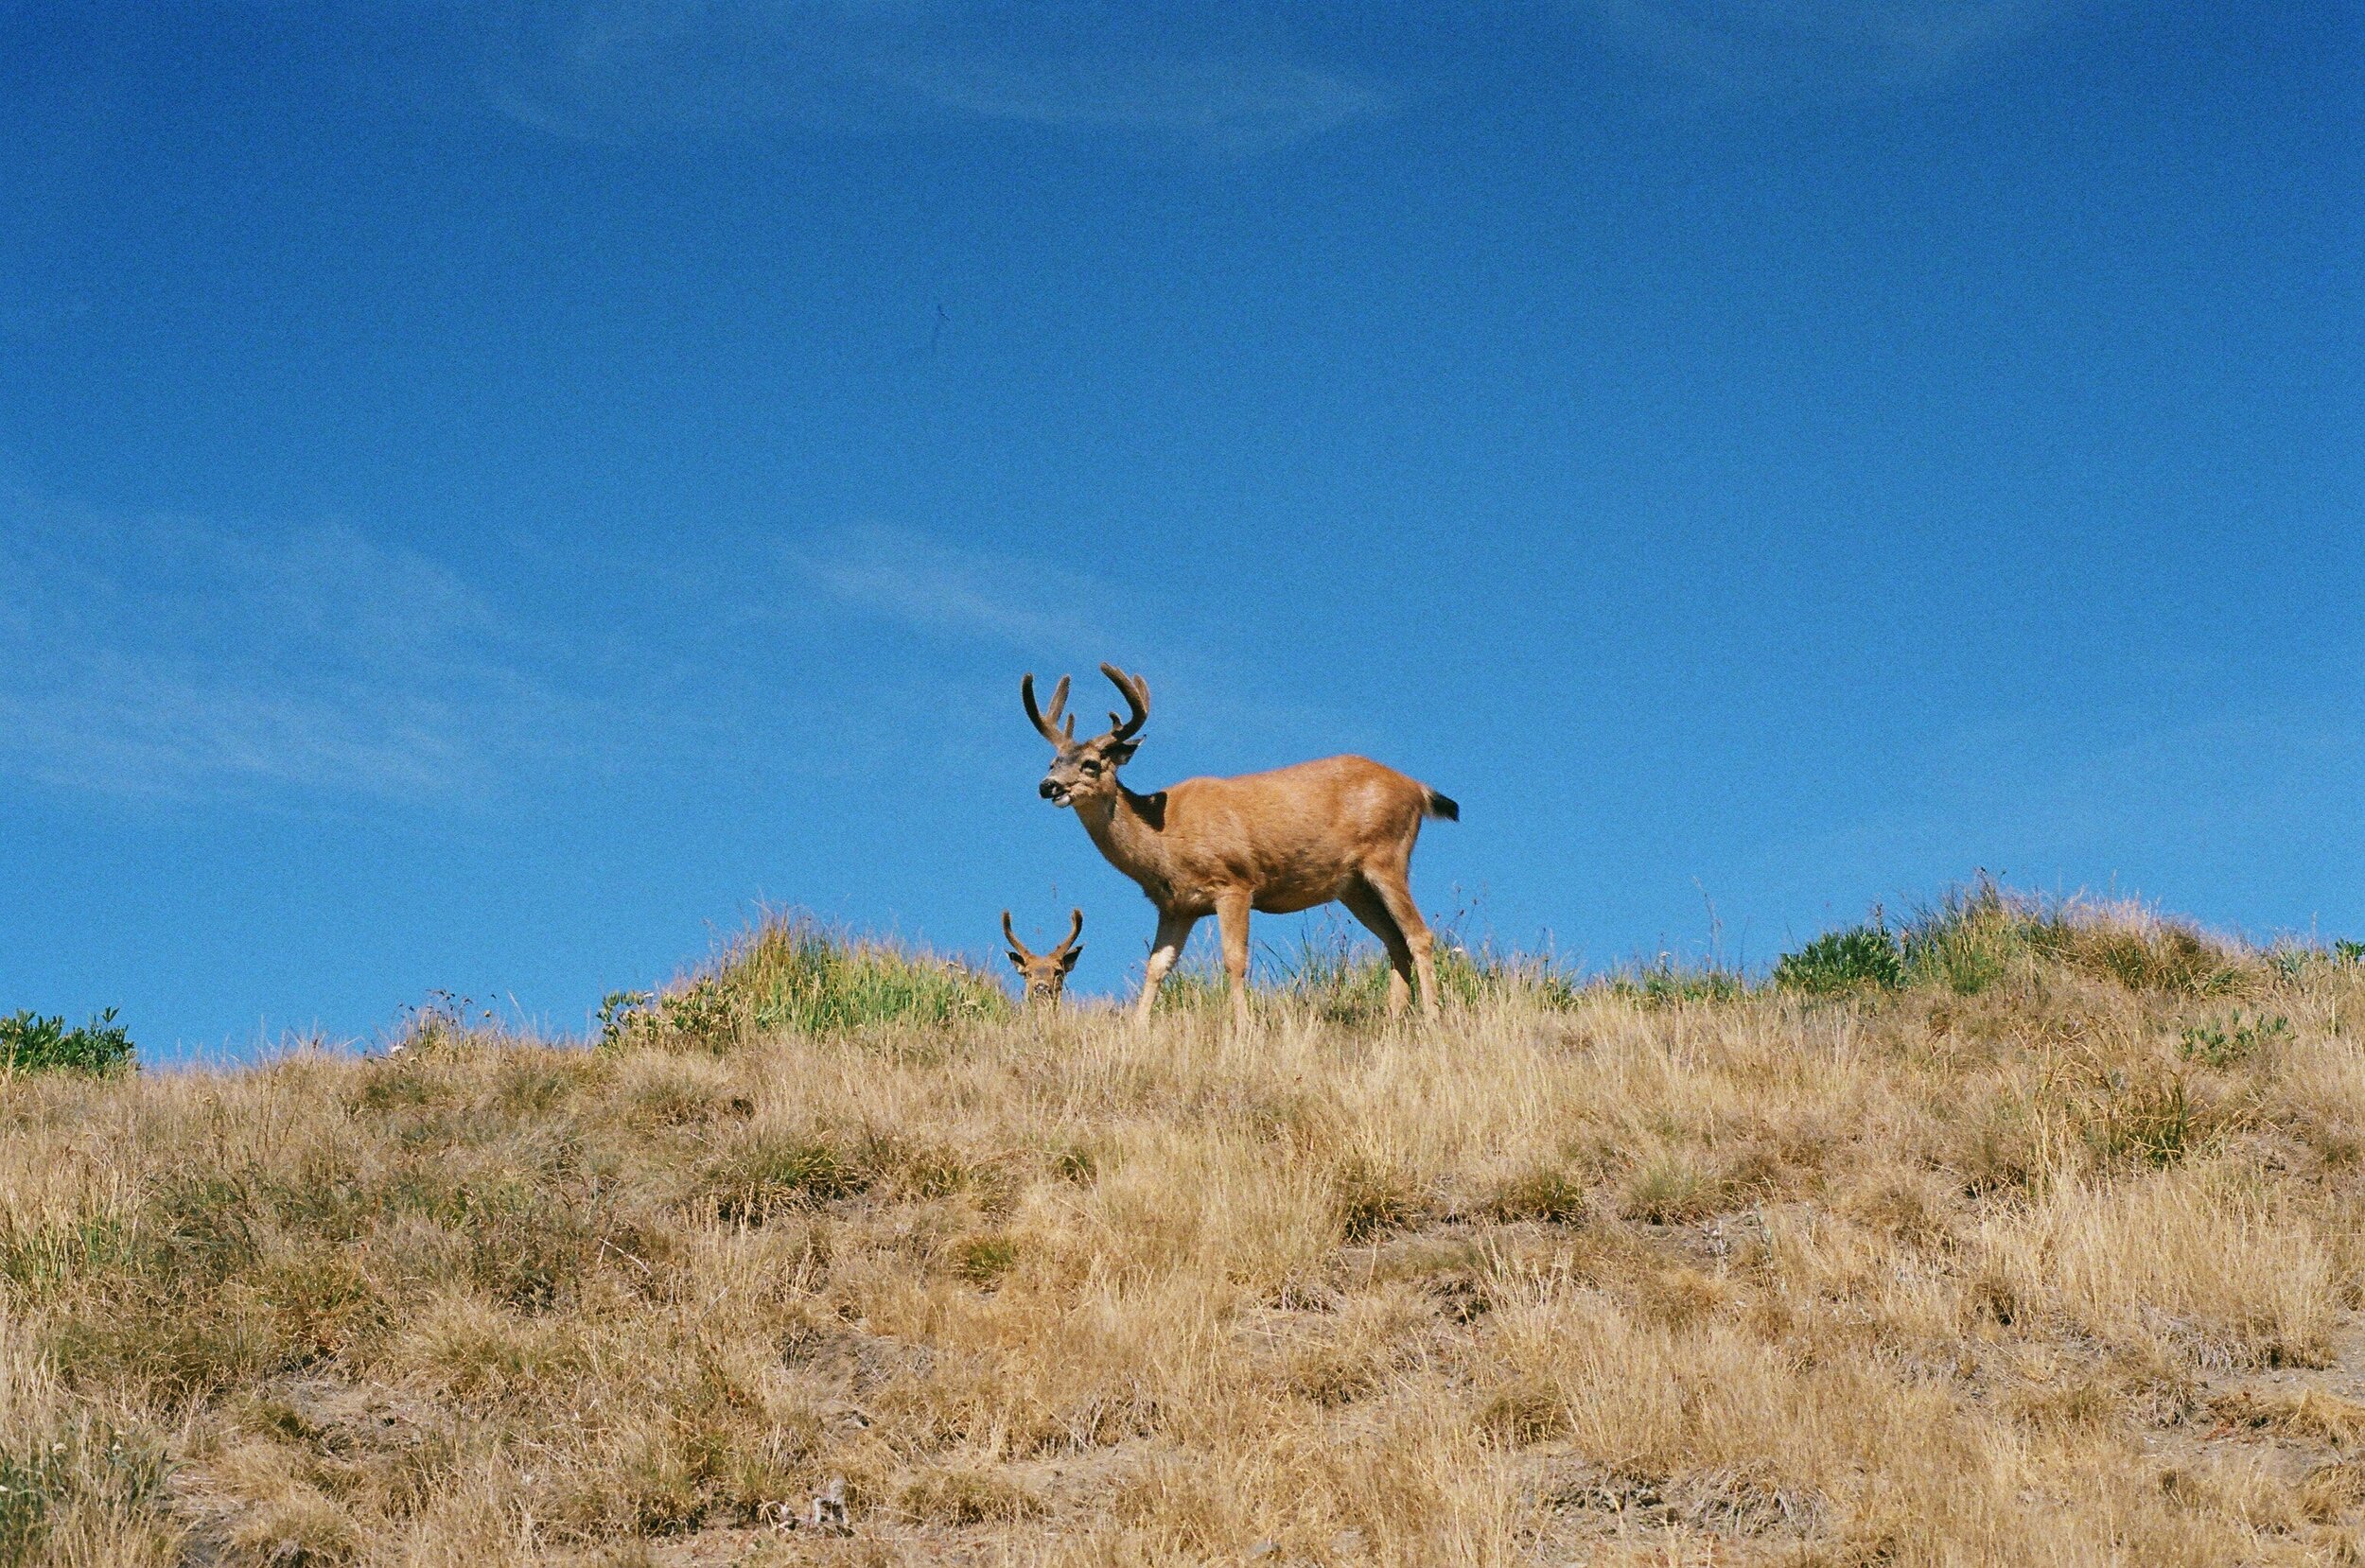
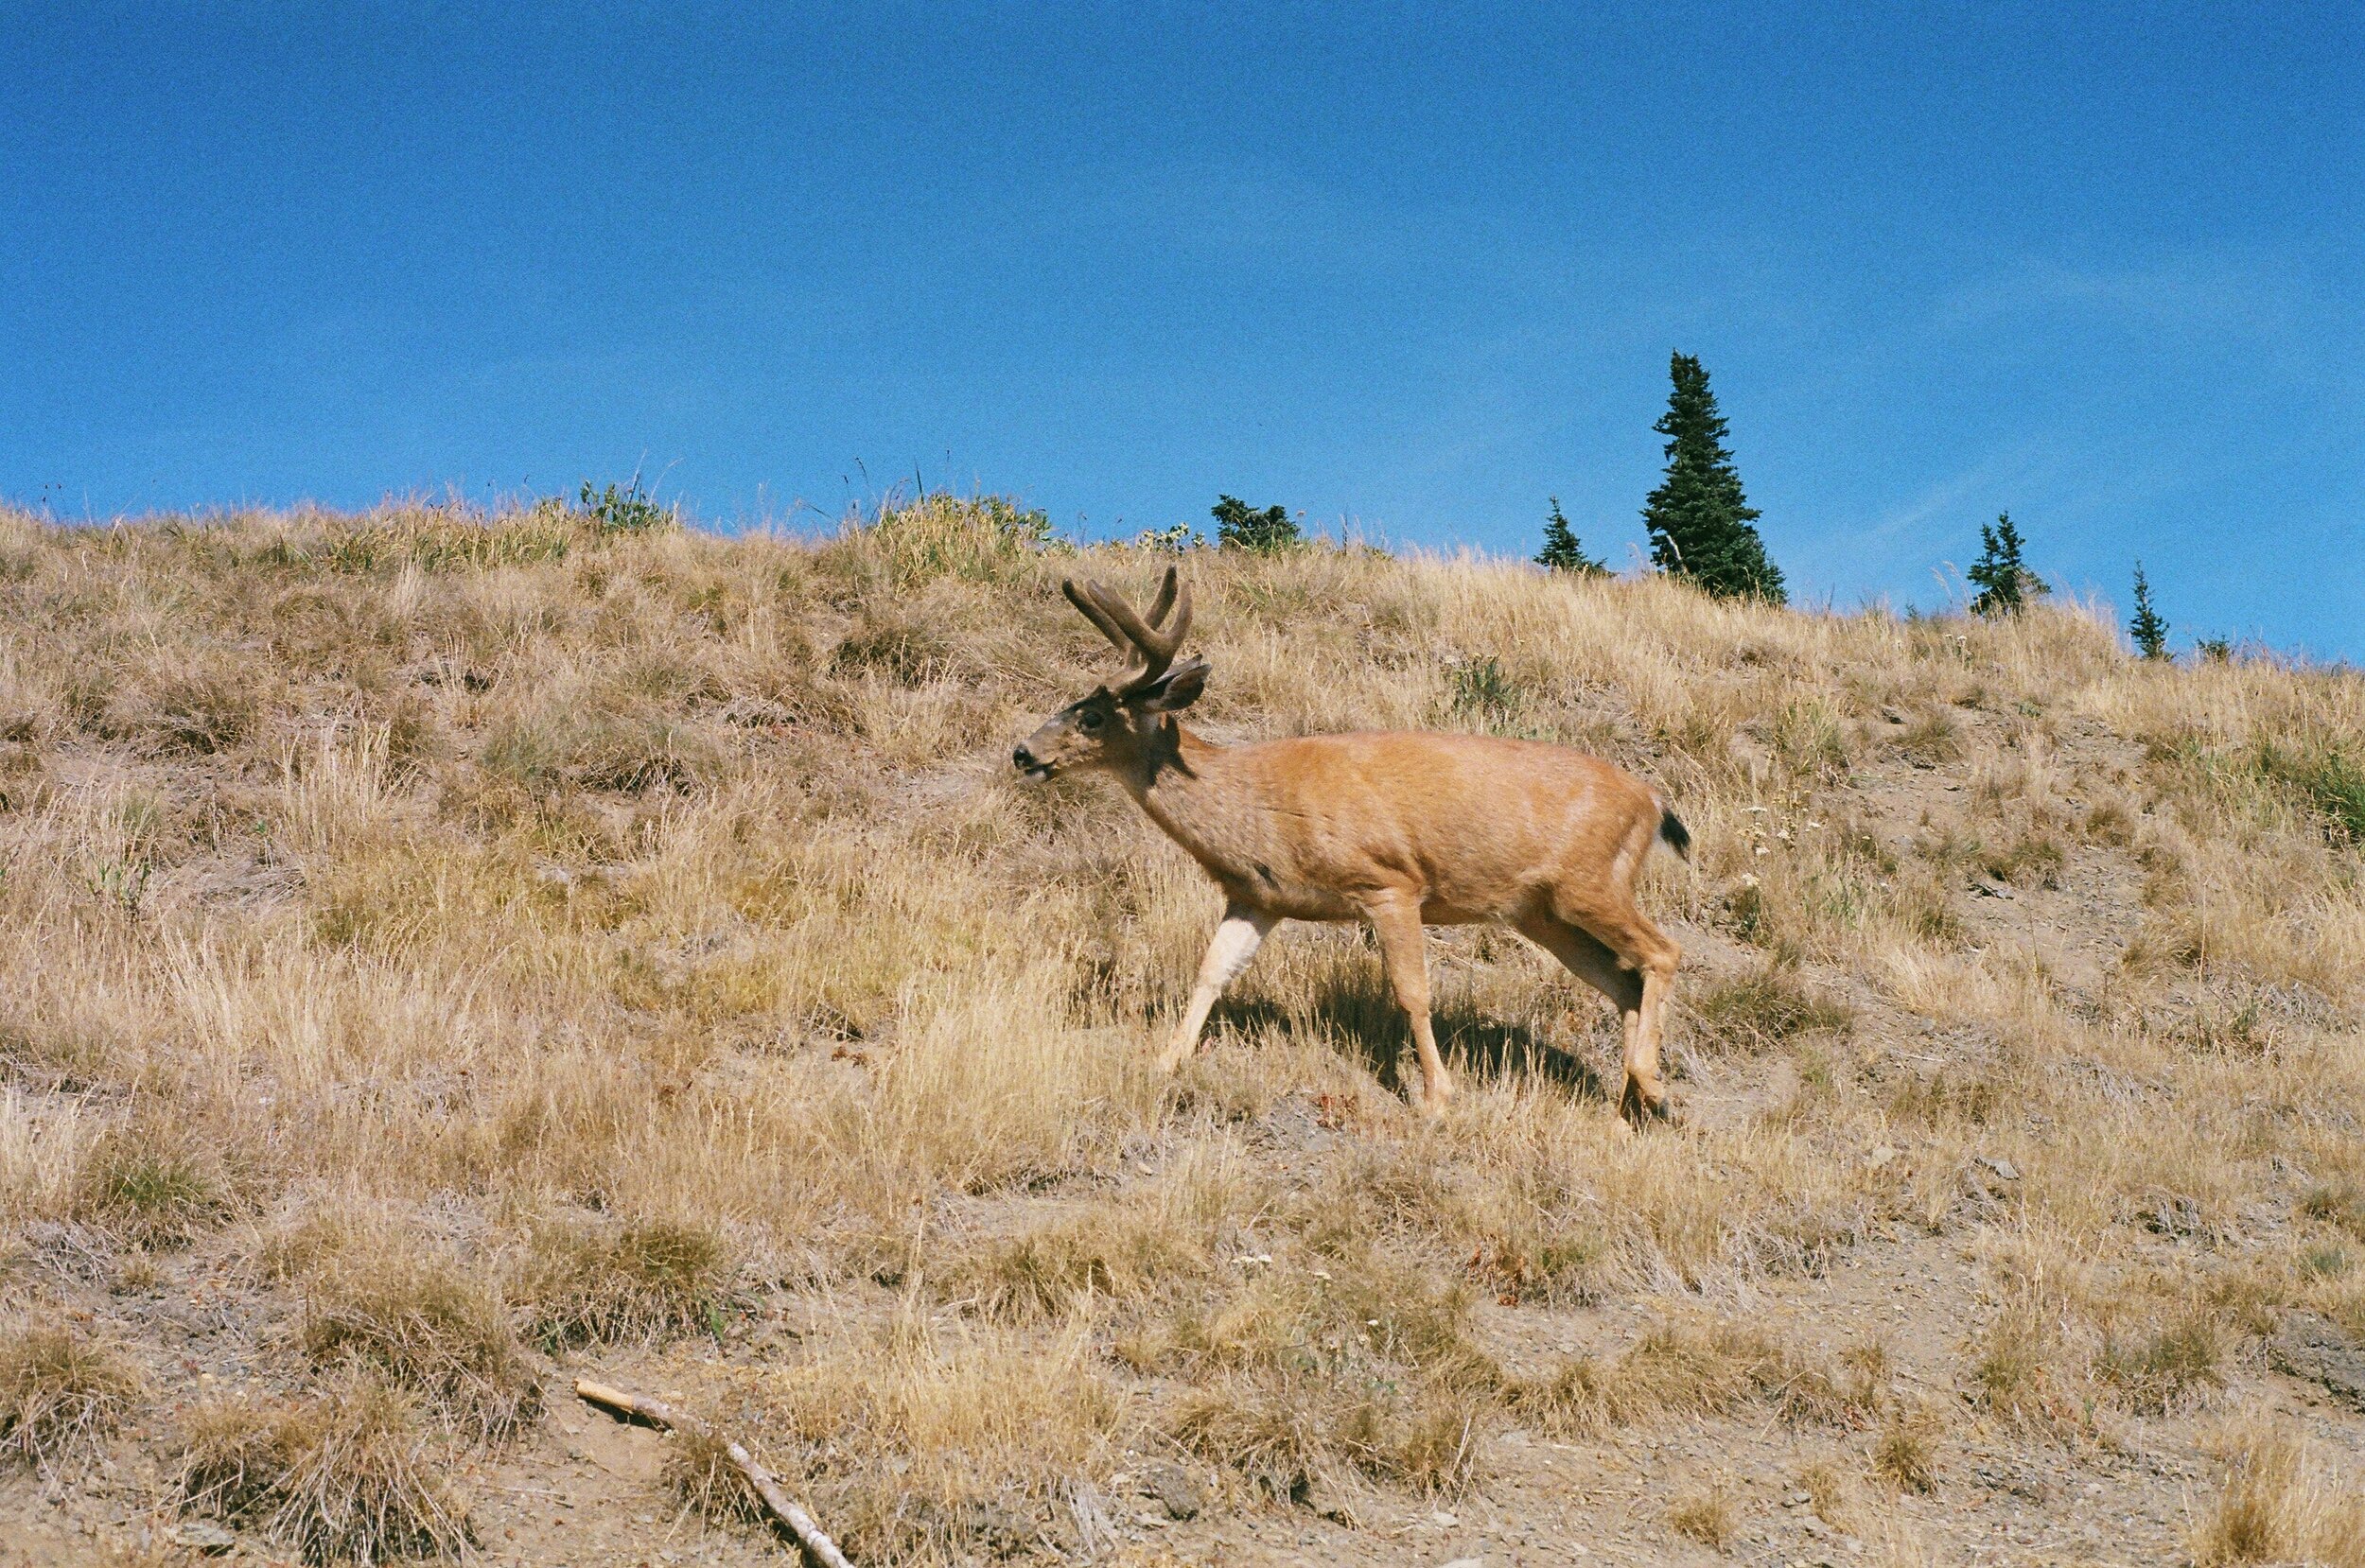
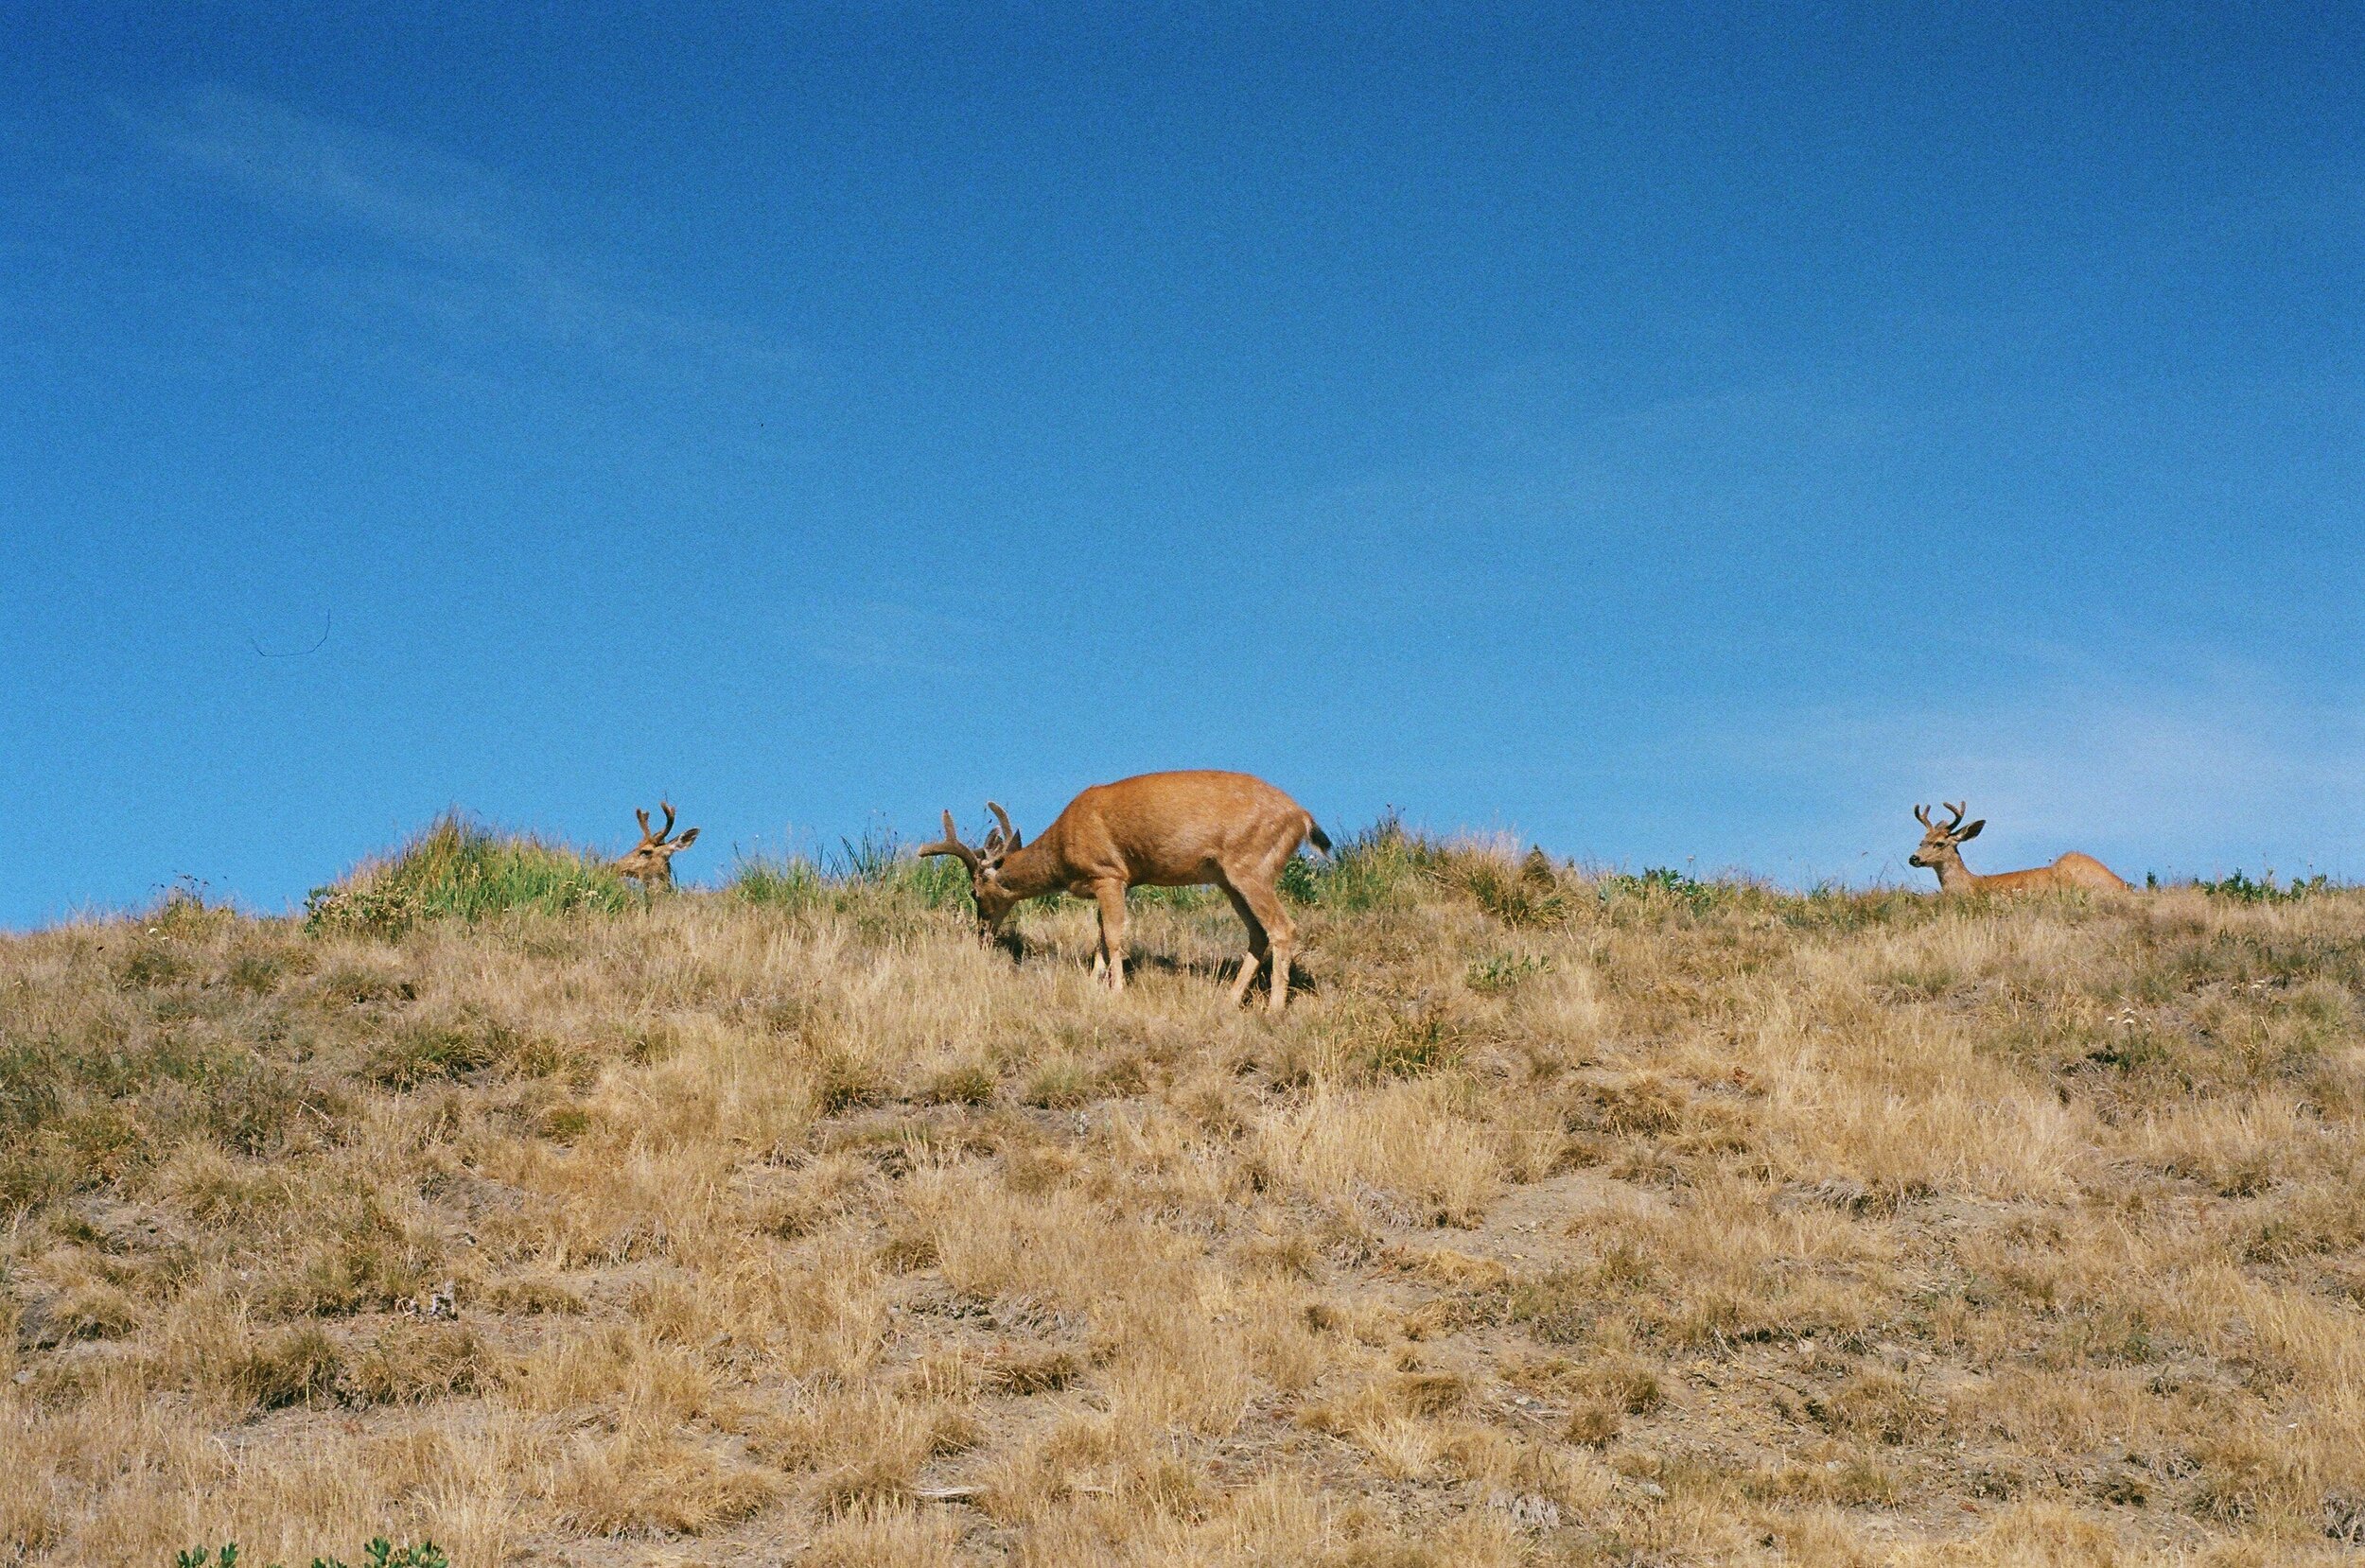
For these first few photos, we are heading to Olympic National Park, specifically Hurricane Ridge. This is my first time at this location and I’m going to be honest, I think it’s way overhyped. Don’t get me wrong it’s a nice place to be and has some nice views but you’re essentially just looking at distant ridgelines. It reminds me of Paradise at Mt. Rainier National Park but with a lot less to do. This is a place that I would suggest visiting if you’re already hitting other places in Olympic National Park, not a place that I’d spend the currently $30 entrance fee to solely go to. The highlight of my Hurricane Ridge trip was actually leaving because right as I pulled out of the parking lot, a couple of reindeers showed up and were grazing right beside the road. They were the only thing that I photographed here. I was trying really hard to get the center deer doing something graceful but all I could get was a couple of half-open-mouthed chews. As far as Ultramax 400, something I noticed right away was the amount of grain in this film. This is kind of expected being that it’s 400 speed but even so, I would say this is on the grainier side of the spectrum. Something also pretty apparent is the shift towards the yellows. Everything looks a bit warmer than reality.

Moving on, we are continuing our journey along the Olympic peninsula and stopping at a place called Ruby Beach. This was our last destination for the night and we arrived just as the sun was setting. This picture was taken pretty much at the parking lot and just as you begin the trek down to the beach. I actually really like this view and do plan to come back here at a future time.

Next, we are down on the beach, essentially looking at the large rocks from the previous photo. Here, the sun is just on the horizon, on the left edge of the photo, just out of frame. For this, I wanted to expose for the sky and just get a silhouette of the rocks. I wouldn’t necessarily say that I got what I wanted on film, but here’s another picture that I took of the same location but different composition. I think this composition was stronger than trying to get all the rocks in frame.

For the next few photos, we head to The Needle Lounge, a local tattoo shop in Lakewood, WA. I did this to change it up and get some indoor environmental portraitures. This kind of shows what the film can do indoors with just the artificial lighting of the room. Again, I would say that there’s some pretty noticeable grain. Also, with pictures like these where we have more definable subjects, I would say that it shows that the film stock is a bit soft and there isn’t a lot of fine details. Everything just has a softness to it, even the in-focused bits.

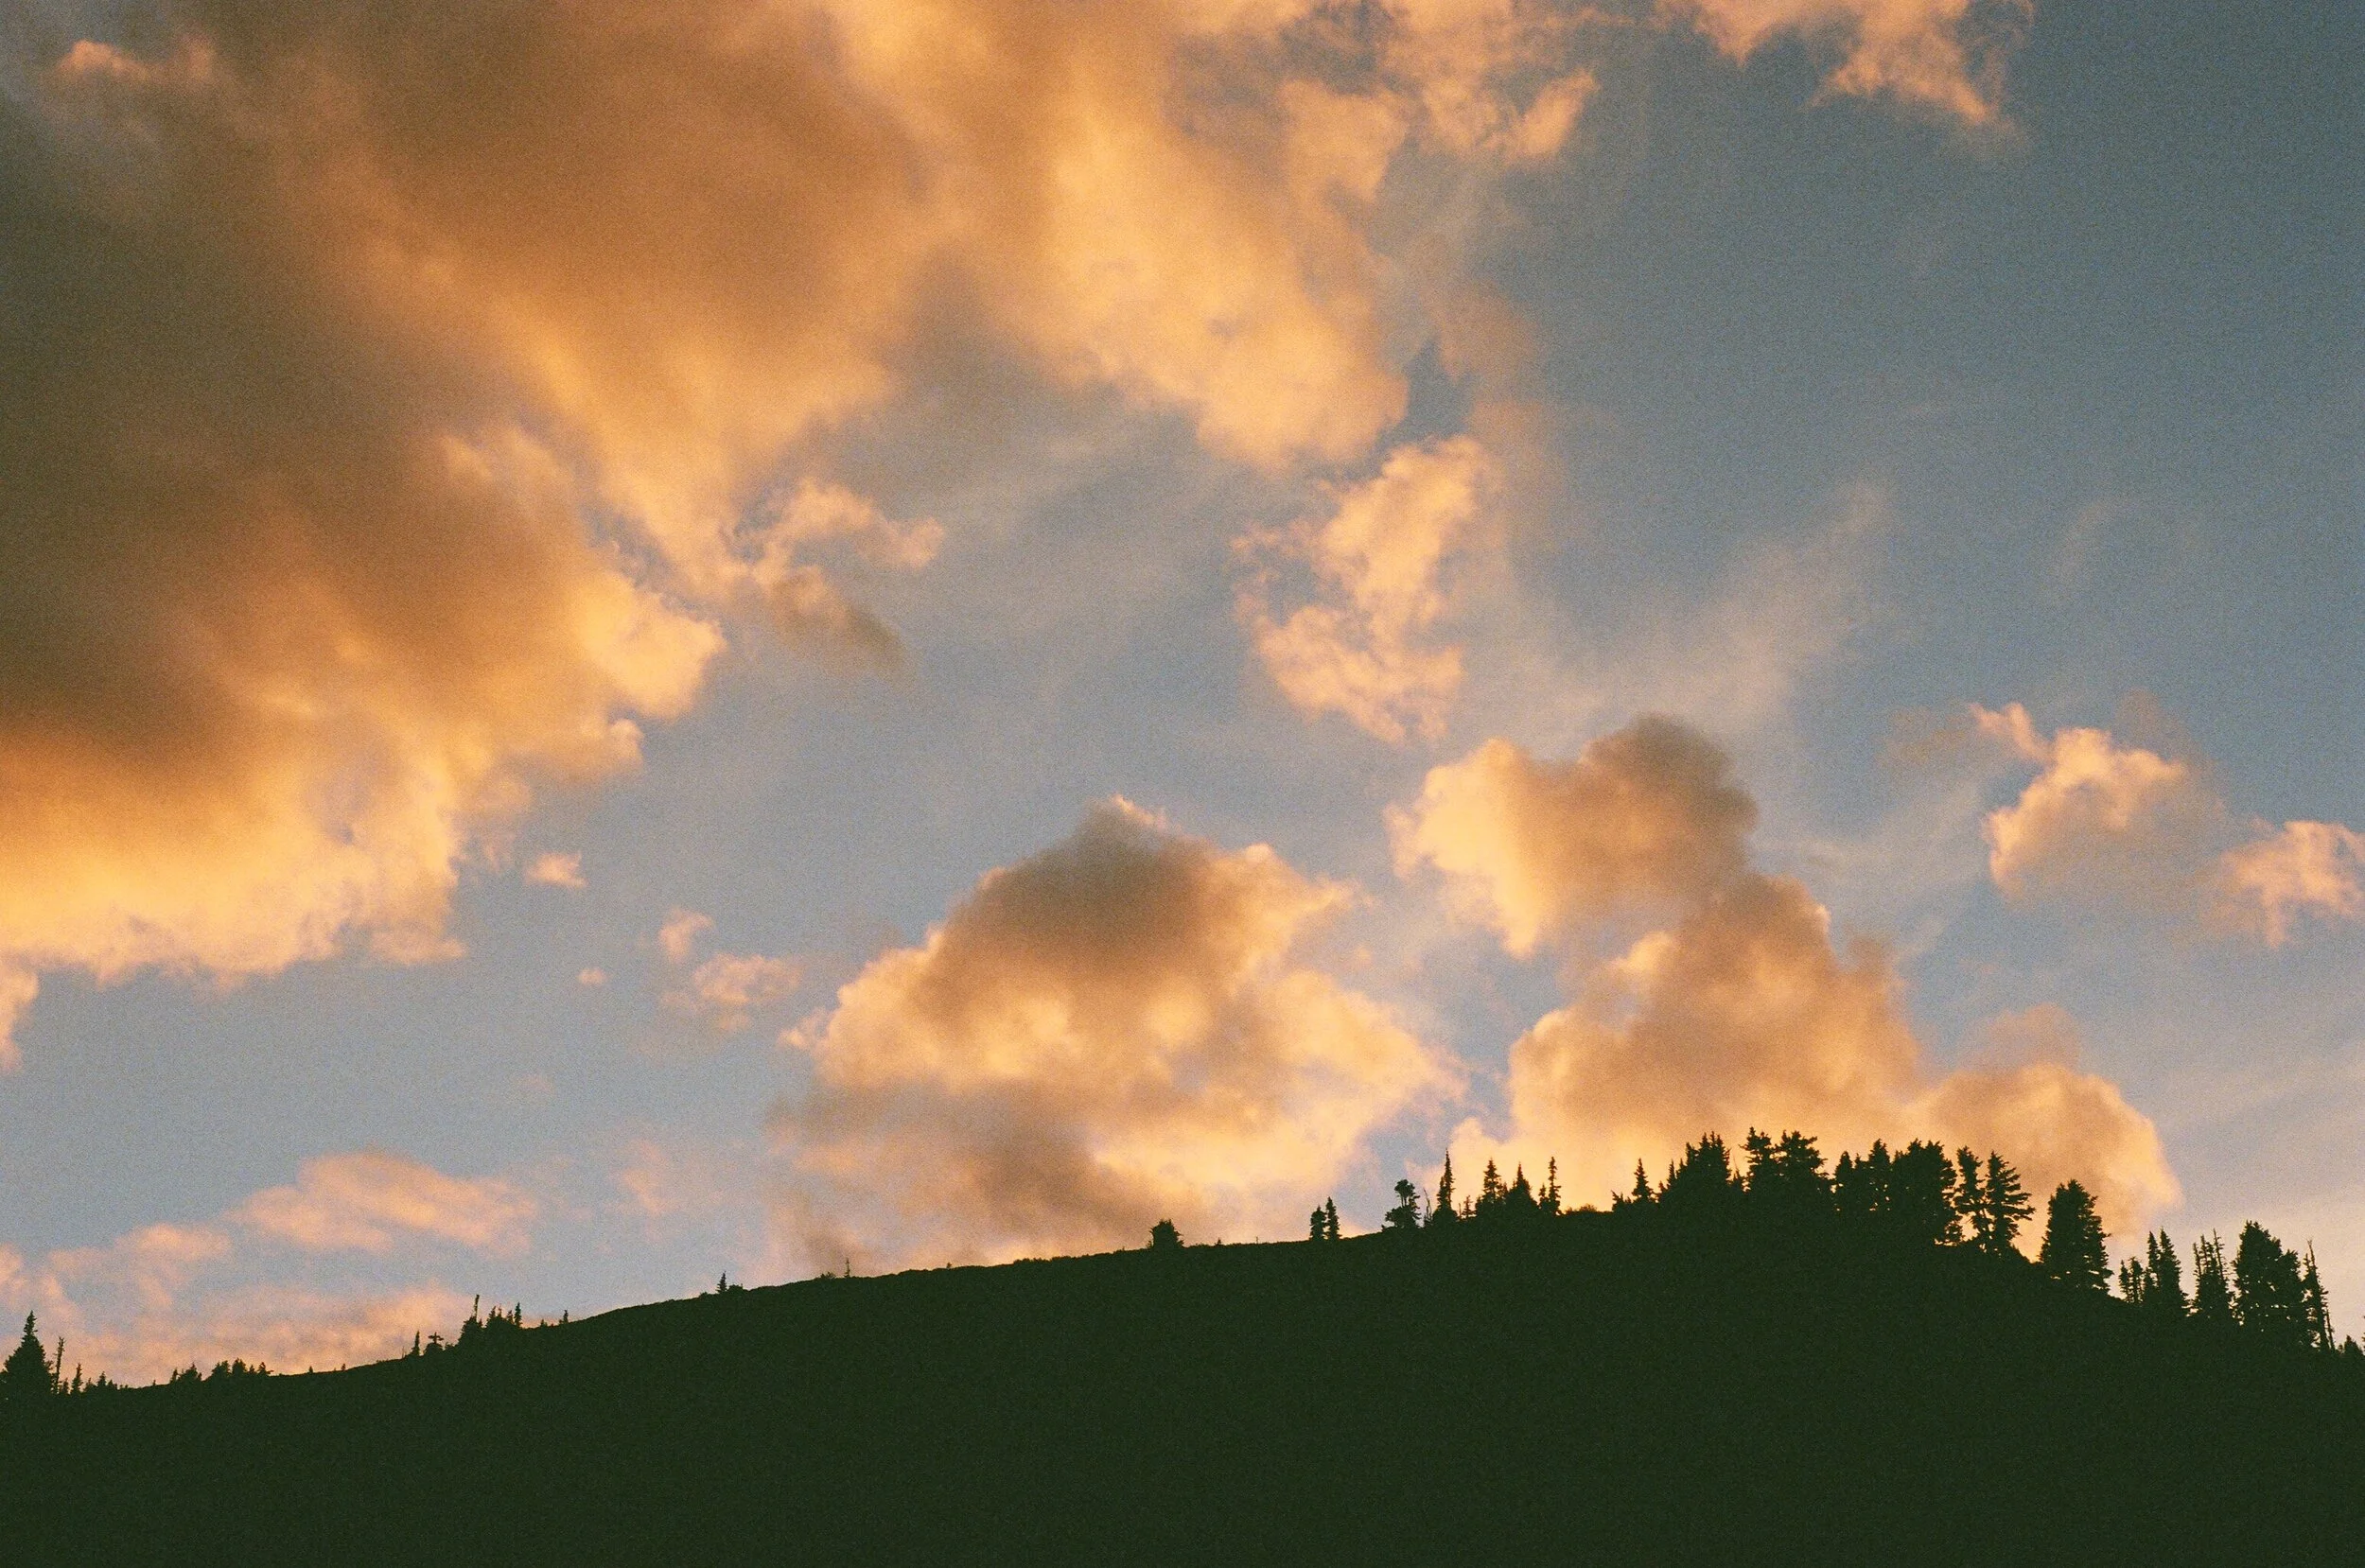
Next up, we have a couple more sunset photos from one of my drives near home. Again, exposed for the sky with silhouette foreground. Something that I’ve been doing a lot. With this photo, I actually like the colors of the sky a lot. The camera did a good job with exposure and we can see colors throughout the entire sky. Nothing’s blown out.

74720015.JPG

Now, we are going to head to Mt. Rainier National Park. This was on one of my more spontaneous trips here, heading out and arriving just before sunset. In my opinion, Mt. Rainier is one of those subjects that’s easy to take a picture of, but really hard to get something mind-blowing, especially if you’re trying to get it at sunrise or sunset. A lot of the more accessible locations are just not aligned right with the sun’s path. This was one of the nights where things were really close and the sky was lighting up, but just slightly to the side of where I wanted it to be.

74720016.JPG

I should note that with my Nikon film cameras I almost always shoot with a 50mm lens. I have wider lenses but just completely forgot them for this occasion and this is me paying the price. Things are just too close for my taste here. Again this is at 50mm and here’s the digital picture I took at 28mm. As you can see, a big difference in terms of what is actually in the frame. This is a reminder to always come prepared. Better to have a not use than to need and not have.

Here’s a look at the sky, just to the side of the mountain. Parts of it actually looked pretty good, just not where I want it to be.

Here’s another example of the 50mm focal length on film versus 30mm on digital.

For the next few photos, we are heading to Chambers Bay, a local park and pretty well-known golf course. Again, at sunset. I just realized as I’m making this post that almost the entirety of this roll was taking around sunset. For the first photo, I’m just shooting through the three lonely freestanding trees. I didn’t think that this would be anything, and realistically it’s a snapshot but it doesn’t look too bad. The colors in the sky are soft and have a nice gradient. We can see the sun setting directly in the middle which the camera exposed for and we, again, get the silhouetted foreground.

Another similar shot but with a different subject.

This one, I did the same thing but looking back, I should’ve exposed with more emphasis on the foreground because upon review of these images, even I’m like what is that? In the foreground is actually a passing train. I think in the case exposing somewhere in the middle would’ve been the best route but then the sky wouldn’t look all the great and the train wouldn’t look all that great. So are the limitations of this type of film photography. You just got to live with it and know what you’re getting into.

This next one isn’t really anything special in terms of subject but I wanted to show it because I actually like the colors. The warm, yellow tint of this film really plays well with the setting sun behind me.

Here’s another example of that. The subject is just some giant manmade rock structures but the colors don’t look too bad at sunset.

Finally, with the last few photos, we head to Alki Beach in West Seattle for another sunset. Here’s a look at the skyline. This is typically a snapshot like something you’d see in a family photo album.

Next, I don’t even know what this is. I remember it being a lot better of a composition in person but actually seeing it on screen is something else.

This one is a bit better. It’s me, shooting through the branches of that last tree to get another angle of the Seattle skyline. This would’ve looked better with the Space Needle in the center but then the right portion of the skyline would’ve been cut out more and there really isn’t anything to the left.

Here’s one of a pier along the boardwalk.

Connected to that pier is this little stairway leading to the beach. As you can see, it was high tide and I wanted to take a piccture of this scene but I didn’t know how I wanted to do it. I actually just freehand this close to the ground without even looking in the viewfinder because I wasn’t going to lay in the sand for something I knew I was likely not going to care for. And because I did that, the horizon is lopsided.

Then with this final picture, I was actually setting the camera up on a tripod, getting ready to use the self-timer for the first time. But not fully knowing how to do that, the camera actually took a picture when I didn’t want it to and I didn’t even get a chance to go in. Oh well, lesson learned.

And that’s it guys. A look at Kodak Ultramax 400 with some views around Washington state. Overall, this is a pretty grainy film. It’s not that sharp and the colors lean towards the yellows. Those things are pretty apparent. But considering that this film stock was developed to be budget friendly and for everyday cataloging, I’m not mad about it. I think if you understand the characteristics of this film, you can definitely use it towards your advantage, particularly to get some pretty nice colors.


If you're considering buying any of the products mentioned, please support my work by using the links below.

Kodak Ultramax 400 https://amzn.to/3jh4XVe

Nikon N2020 https://amzn.to/3gsi7wA


Want to support my work?

Consider visiting the shop and buying "Absolutely Nothing"
https://www.HaiHoangTran.com/shop/absolutely-nothing

or

Become a YouTube member!

https://www.youtube.com/channel/UCLUO-2ltlWfydRZ7pRRnXkw/join

Become a Patron!
https://www.patreon.com/HaiHoangTran

or

Buy some official merch!
https://www.youtube.com/haitran/store

PayPal
https://www.PayPal.me/HaiHoangTran

or

Just shop on Amazon via this link!
https://amzn.to/2FgsDnG
Kodak TMAX 400 vs Ilford Delta 400 Professional


This blog post is meant to act as a supplement to the video linked above where I compare Kodak TMAX 400 and Ilford Delta 400 Pro. The main purpose of this post is to include images so that you’re able to better see the differences that I mentioned in the video. All images are as scanned and unedited.

Click on the thumbnails to see a larger image. The first image will always be of Kodak TMAX 400 and the second image will always be of Ilford Delta 400 Pro.


If you're considering on buying any of the products mentioned, please support my work by using the links below.

Kodak TMAX 400 https://amzn.to/2HeqRWe

Ilford Delta 400 Professional https://amzn.to/2XFjayb

Nikon N2020 https://amzn.to/2PC53oX

Nikon N90S https://amzn.to/2CMR39i

Nikon 50mm f/1.8D https://amzn.to/2CMEPxk

Ilford DD-X Developer https://amzn.to/2PxtUdG

Ilford Ilfostop https://amzn.to/2yFBhIO

Ilford Rapid Fixer https://amzn.to/2CP7QIw


Want to support my work?
Consider visiting the shop and buying "Absolutely Nothing"
https://www.TheUpperLeftUSA.com/shop/absolutely-nothing

or

Become a Patron!
https://www.patreon.com/HaiHoangTran

The best way to color correct C-41 negative film scans


I’ve largely been unhappy with my process for color correcting C-41 scans so I searched online to see what other people were doing. After going through a few Google pages, I came across a post on iamthejeff.com titled The best way to color correct C-41 negative film scans. In short the author developed a really quick way to color correct C-41 negative scans that from personal experience, seems to work very well. If you’re in need of a similar process, check out the video above where I go through iamthejeff’s process for color correcting C-41 negative film scans.

This process of color correcting C-41 film scans is straight forward, easy to do and quite effective. From my experience with this process so far, it pretty much works with every scan that I’ve thrown at it but there are a few drawbacks. The first being that some scans are a bit more tricky to color correct if there are elements that introduce multiple color shifts to the scene. Really, I don’t put too much fault on this process because images like the last one that I demonstrated on in the video is difficult to edit with any process that I’ve tried. Most processes, like this one, use global adjustments that effect all colors of an image. This will get the job done in most cases but some images will need further refinement with local color adjustments. 

Another thing about this process is that it kind of requires the editor to know how a certain scene is supposed to look in terms of color. For example, that last image again. I knew what the jacket was supposed to look like, it’s suppose to be off white. However, using this process I could only get the jacket to look somewhat beige or a light tan. Someone else editing this image may not know better and might stop at that. To me, it’s difficult to color correct with this process without having a good idea of what the colors should be. So in cases where you are not editing your own scans or you just completely forgot what the scene was suppose to look like, things may not look true to life. 

Edited with just iamthejeff’s process

Further edited to remove the color cast

Lastly, this is a process that you want to utilize when you want natural accurate tones, not so much for accurately representing a film stock. Think of it this way, some film stocks just inherently have a color shift. Some are just more green or more magenta than others or real life and if you want to accurately represent these film stocks, you have to show the color shift. Unless you have a really good photographic memory for just how much of a certain tint a film stock is supposed to have, it’ll be really hard to represent that with this process. Some other color correction programs utilize an entire database of different film stocks to cross reference in order to make all scans of a film stock look a certain way. That is obviously not the case with this process. Here, we are only looking at each image individually and apply color correction base on how we interpret each image, essentially just eye balling it and making adjustments based on personal preference. So, at the end of the day, all film stocks will largely look like each other in terms of color when using this process. Again, this process should not to be used to accurately represent the colors of a film stock. This process should be used for getting even, natural tones. 

At the end of the day though, this is a free process shared for anyone to use. If you don’t like it, no harm done because you didn’t pay anything for it. Me personally, I will probably continue to use this process as a first step to color correct all of my C-41 scans. This process is very fast and it gets me to a place that I’m happy with and can do further adjustments upon. If you’re looking for an easy and fast way to color correct C-41 negative scans, definitely give this process a try.


UPDATE

Unfortunately, the original creator of this method has taken his website down but an archive of it along with a download link of the action can be found here: https://web.archive.org/web/20170702193137/https://www.iamthejeff.com/post/32/the-best-way-to-color-correct-c-41-negative-film-scans


Want to support my work?
Consider visiting the shop and buying "Absolutely Nothing"
https://www.HaiHoangTran.com/shop/absolutely-nothing

or

Become a Patron!
https://www.patreon.com/HaiHoangTran